cts
Developing
The WebGPU CTS is written in TypeScript.
Setup
After checking out the repository and installing node/npm, run:
npm ci
Before uploading, you can run pre-submit checks (npm test) to make sure it will pass CI.
Use npm run fix to fix linting issues.
npm run will show available npm scripts.
Some more scripts can be listed using npx grunt.
Dev Server
To start the development server, use:
npm start
Then, browse to the standalone test runner at the printed URL.
The server will generate and compile code on the fly, so no build step is necessary.
Only a reload is needed to see saved changes.
(TODO: except, currently, README.txt and file description changes won’t be reflected in
the standalone runner.)
Note: The first load of a test suite may take some time as generating the test suite listing can take a few seconds.
Documentation
In addition to the documentation pages you’re reading, there is TSDoc documentation. Start at the helper index.
Standalone Test Runner / Test Plan Viewer
The standalone test runner also serves as a test plan viewer. (This can be done in a browser without WebGPU support.) You can use this to preview how your test plan will appear.
You can view different suites (webgpu, unittests, stress, etc.) or different subtrees of the test suite.
http://localhost:8080/standalone/(defaults to?runnow=0&debug=0&q=webgpu:*)http://localhost:8080/standalone/?q=unittests:*http://localhost:8080/standalone/?q=unittests:basic:*
The following url parameters change how the harness runs:
runnow=1runs all matching tests on page load.debug=1enables verbose debug logging from tests.worker=dedicated(orworkerorworker=1) runs the tests on a dedicated worker instead of the main thread.worker=sharedruns the tests on a shared worker instead of the main thread.worker=serviceruns the tests on a service worker instead of the main thread.power_preference=low-powerruns most tests passingpowerPreference: low-powertorequestAdapterpower_preference=high-performanceruns most tests passingpowerPreference: high-performancetorequestAdapter
Web Platform Tests (wpt) - Ref Tests
You can inspect the actual and reference pages for web platform reftests in the standalone runner by navigating to them. For example, by loading:
http://localhost:8080/out/webgpu/web_platform/reftests/canvas_clear.https.htmlhttp://localhost:8080/out/webgpu/web_platform/reftests/ref/canvas_clear-ref.html
You can also run a minimal ref test runner.
- open 2 terminals / command lines.
- in one,
npm start - in the other,
node tools/run_wpt_ref_tests <path-to-browser-executable> [name-of-test]
Without [name-of-test] all ref tests will be run. [name-of-test] is just a simple check for
substring so passing in rgba will run every test with rgba in its filename.
Examples:
MacOS
# Chrome
node tools/run_wpt_ref_tests /Applications/Google\ Chrome\ Canary.app/Contents/MacOS/Google\ Chrome\ Canary
Windows
# Chrome
node .\tools\run_wpt_ref_tests "C:\Users\your-user-name\AppData\Local\Google\Chrome SxS\Application\chrome.exe"
Editor
Since this project is written in TypeScript, it integrates best with
Visual Studio Code.
This is optional, but highly recommended: it automatically adds import lines and
provides robust completions, cross-references, renames, error highlighting,
deprecation highlighting, and type/JSDoc popups.
Open the cts.code-workspace workspace file to load settings convenient for this project.
You can make local configuration changes in .vscode/, which is untracked by Git.
Pull Requests
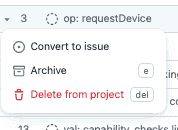
When opening a pull request, fill out the PR checklist and attach the issue number. If an issue hasn’t been opened, find the draft issue on the project tracker and choose “Convert to issue”:
Opening a pull request will automatically notify reviewers.
To make the review process smoother, once a reviewer has started looking at your change:
- Avoid major additions or changes that would be best done in a follow-up PR.
-
Avoid deleting commits that have already been reviewed, which occurs when using rebases (
git rebase) and force pushes (git push -f). These can make it difficult for reviewers to review incremental changes as GitHub usually cannot view a useful diff across a rebase. If it’s necessary to resolve conflicts with upstream changes, use a merge commit (git merge) and don’t include any unnecessary changes in the merge, so that a reviewer can skip over merge commits when working through the individual commits in the PR.The “Create a merge commit” merge option is disabled, so
mainhistory always remains linear (no merge commits). PRs are usually landed using “Squash and merge”. - When you address a review comment, mark the thread as “Resolved”.
TODOs
The word “TODO” refers to missing test coverage. It may only appear inside file/test descriptions and README files (enforced by linting).
To use comments to refer to TODOs inside the description, use a backreference, e.g., in the
description, TODO: Also test the FROBNICATE usage flag [1], and somewhere in the code, [1]:
Need to add FROBNICATE to this list..
Use MAINTENANCE_TODO for TODOs which don’t impact test coverage.